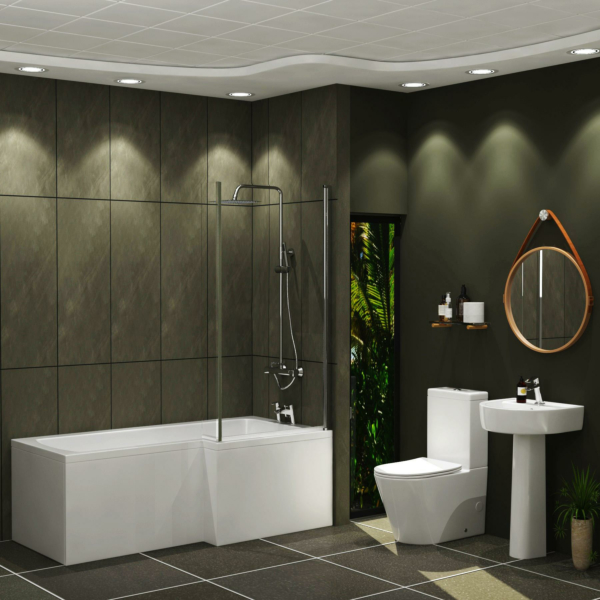
Not every one of us has a lot of space available in the bathroom. That’s why an L shaped shower bath is in high demand. Though you can use them comfortably for the shower, the only problem that you may face is water splashes spilling out of the shower bathtub area. To prevent them, you will either need a shower curtain or a shower screen. You may pick the shower curtain for your L shaped bath, but these may easily get mold and mildew. If you prefer contemporary looks and want a neat and tidy bathroom, then a shower screen is probably the best option for you. Though it may be a bit more expensive than the shower curtain but will take your shower bath look to another level.
In case you have a L Shaped Shower Bath, then it may be a good idea to plan for a shower screen. You may keep the costs down by installing it on your own.
In this article, we are going to explain the DIY method of shower screen installation on shower bath.
Tools You Will Need
Before you move on to the actual shower bath installation process, make sure you have all the tools available with you. You will specifically need the
- Drilling Machine
- Screwdriver
- Pencil
- Hammer
- Level
- Measuring Tape
Step By Step DIY L Shaped Shower Bath Screen Installation Process
You will need to approach the installation process with different steps that are under discussion here.
Step 1. Measure and mark the position of the L shaped shower bath
The first step in installing a new shower screen is to measure and mark the position of the screen on the wall. This will ensure that the screen is properly positioned and will allow you to make any necessary adjustments before permanently affixing the screen to the wall. Use a level to make sure that the marks are level, and then use a tape measure to mark the position of the top, bottom, and sides of the shower screen. Once the position is noticeable, you can begin to install the shower screens.
Step 2. If you’re using a frameless shower screen, attach the brackets to the wall and then fix the screen in place
A frameless shower screen can give your bathroom a more modern look, and it can also be easier to keep clean. However, installation can be a bit more complicated than with a traditional framed shower screen. The first step is to attach the brackets to the wall. It’s important to make sure that they are level, so take your time and use a level if necessary. Once the brackets are in place, you can then fix the screen in place.
Start at the top and work your way down, making sure that each side is evenly set in the brackets. Once the screen is in place, you can then finish up by attaching the handle or handles. With a little patience, you’ll have a frameless shower screen that looks great and functions well.
Step 3. If you’re using a framed shower screen, fit the frame around the bath before attaching it to the wall
If you’re using a frameless shower screen, the first thing you’ll need to do is attach the brackets to the wall. Once the brackets are in place, you can then fix the screen in place. Make sure that the screen is level and plumb before you start to screw it in place. You will be putting and placing the shower screen on the L shaped shower bath. Once the screen is secure, you can then add any finishing touches, such as capping or sealing. A frameless shower screen is a great way to add style and elegance to your bathroom, and it’s also a practical way to keep your bathroom looking clean and tidy. This process is necessary for the framed shower screen as these will come with a frame that covers it from down its bottom
Step 4. Make sure everything is level and plumb before fixing place shower screen installation
Any DIY enthusiast knows that level and plumb are two of the most important words in the construction world. Make sure everything is level and plumb before fixing the shower screen on L shaped shower bath in place, or you’ll end up with a lopsided result that looks amateurish at best. Use a level when installing shower bath screens or doing any other job where precise measurements are key. To check if something is plumb, use a spirit level or a Laser Level. This will help you to make sure that your surfaces are perfectly straight. With a little care and attention to detail, you can achieve professional-looking results that will last for years to come.
Step 5. Seal any gaps between the shower screen and L shaped shower bath
Even if your shower screen fits perfectly, there may be gaps between the L shaped shower bath and the actual screen. Therefore, it will be a better idea to fill these gaps to avoid the water spillover problem. Silicone sealant is a waterproof material that can be in use to fill in gaps and create a watertight seal. It’s easy to apply and will last for many years, so it’s a great way to protect your bathroom from water damage.
So, the shower screen is finally fitted your L-shaped shower bath is ready to use.


